Are you looking to hop on and play your favorite game with your friends but keep running into a problem. When you try to launch steam it says “Could Not Connect To Steam network”. This sucks and is probably frustrating you.
Luckily in this article we are going to go through a number of fixes that can help you with this problem. Let’s jump in.
1. Check Your Internet Connection
This probably isn’t the issue, but let’s get it out of the way first. To check if you are connected to the internet follow the steps below:
- Click on the Windows button in the bottom left of your screen
- Click on Settings –> Network & Internet
- Here you will see your Status. If you are connected to the internet it will state “You are connected to the internet”.
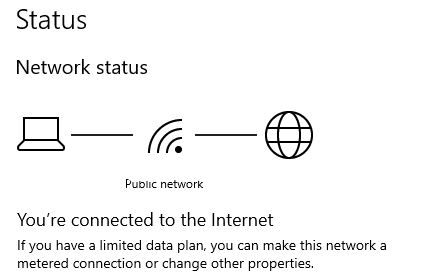
If you are connected then move onto the next step.
2. Run Steam As An Administrator
The next thing you should try is running Steam as an administrator. To do this right click on your steam Shortcut button and click on Run as Administrator.
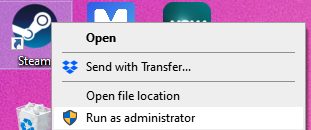
This will give Steam some extra privileges when opening and may fix your problem. If Steam is still not launching move on to the next step.
3. Change The Steam Internet Protocol
A solution that works for lots of users is changing their Steam internet protocol. We will try changing it from UDP (User Datagram Protocol) to TCP (Transmission Control Protocol).
To change this follow the steps below:
- Right-click on your Steam Shortcut and select Properties
- Navigate to the Shortcut Section
- In the Target section add -tcp to the end of text. The full line should be “C:\Program Files (x86)\Steam\Steam.exe”-tcp
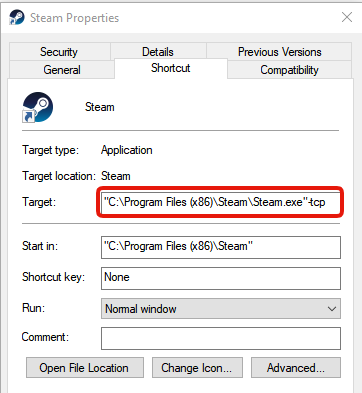
Now go ahead and re-open Steam. Hopefully you are not receiving the could not connect to steam message any longer. If you are, move on to the next solution.
4. Re-install Steam
Next up is simply re-installing Steam. Computers run into problems with installations all the time. A simple re-install can usually clear up any issues.
First you will need to un-install the steam application from your computer. To do this follow the steps below:
- Click on the Windows home button in the bottom left hand corner
- Click on settings –> Apps
- In the Search box, search for Steam
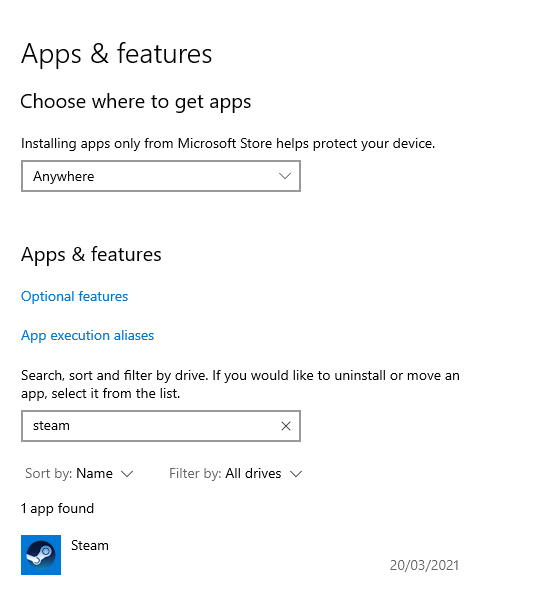
- Click on Steam and select Un-install
You have now successfully un-installed steam and can re-install it by downloading the application from the Steam website.
Once you re-install you should hopefully have instant access to Steam without getting the “Could Not Connect To Steam” Error.
5. Try Disabling Your Firewall Service
If you are still getting the same issue one of the last things we can try is disabling your firewall temporarily. We do not want to do this for an extended period of time and you should turn it back on after testing this.
Depending on the firewall software you use, disable it temporarily and launch Steam again. You may find that Steam can now connect to the network without any issues.
Make sure to turn your firewall back on again after you have tested this method.
6. Update Driver Settings
Next up is making sure that your drivers are up to date on your computer. We want to make sure that the drivers for our network adapter are fully up to date. To do this navigate follow the steps below.
- Click on the windows home button in the bottom left hand corner
- In the search section, search for “Device Manager”. Click on Device Manager
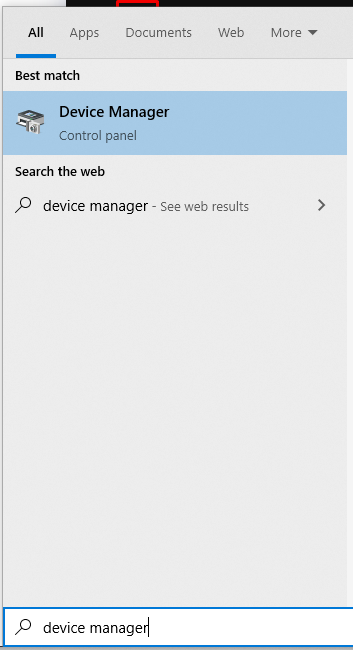
- In Device Manager scroll down to the Network adapters section

- Select your Network adapter and right-click on it –> Update drivers
This will update your drivers to the latest version. This should hopefully fix your problem with “Could not connect to the Steam Network”.
Wrapping Up
Hopefully one of these fixes has helped to get Steam back up and running for you. If it hasn’t then you will have to try and find your own fix. If something else works, let us know in the comments so we can add it to the list.
Read More From Remeshed.com


